I got two amazing Halloween trees last year. However due to space issues in my new home I only have room for one, which is probably ok since I hardly have any ornaments to hang on it yet. I have been seeing this cool vintage looking and very expensive ornaments on Etsy but I just refuse to spend that much money when I know I can make some of my own even though they might not be vintage.
Here is one of my Halloween Trees. As you can tell it looks pretty bare. I will have to make some more when I get a chance. By the way sorry for the bad pictures - the light from the windows make them look all dark.
The first one! I actually made this one using scraps I had laying around from when I made my Halloween Rosette...all the same supplies plus a few extras including one of those amazing Vintage Faceted Designer Buttons...see I managed to put my own vintage spin on them ha! I should mention the the string the ornaments are hanging from is actually White Baker's Twine that I dyed with a ink refill...what a mess I had black fingers for days...
Here is the second one...it also uses some scraps I had laying around but I added a scallop circle punched out of the the silver Glimmer paper. I used my papersnips and cut in each scallop and lightly bent them up for more dimension then I added a big Basic Black button and a Large Pearl Basic Jewel for the center. I didn't want my tulle - which by the way again is Crumb Cake that has been inked with the Staz'on Black Ink - to have the scalloped edge that the Tulle original comes with so I snipped the edge till I liked the way it looked.

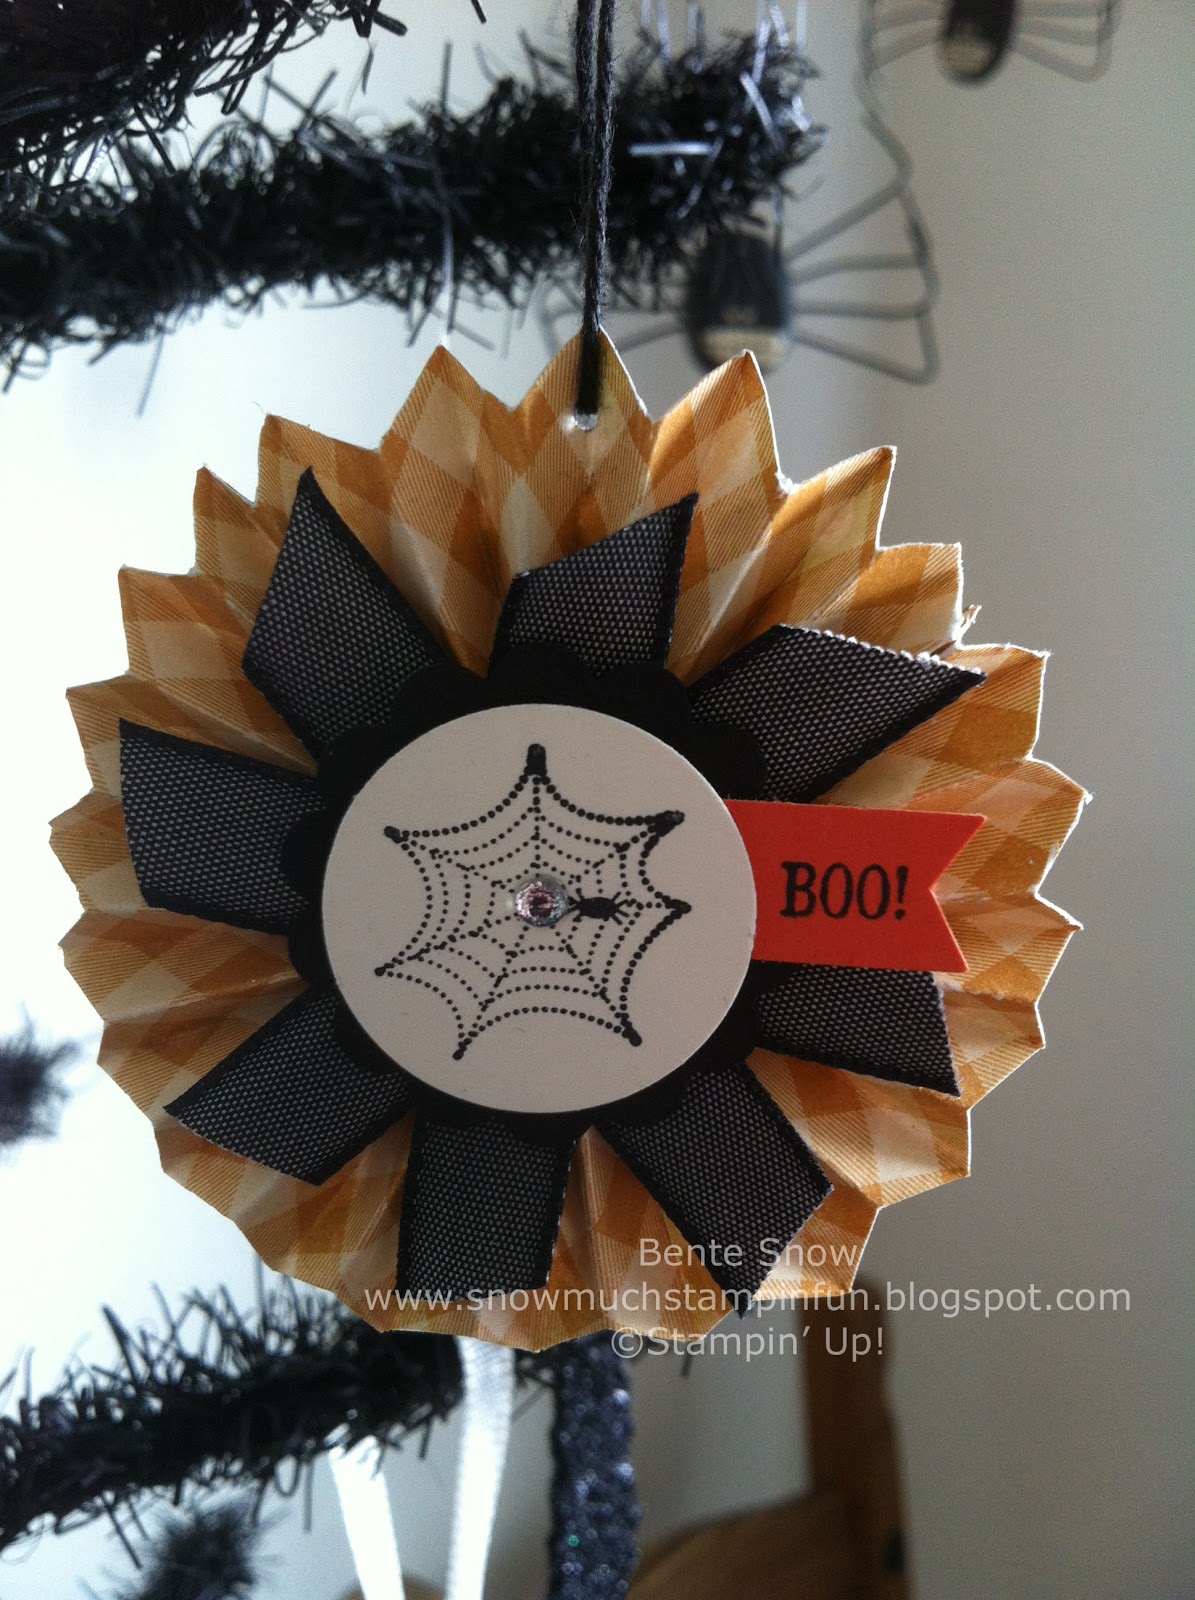
My Boo Ornament I actually made using Orchard harvest Designer Series Paper instead of the Howlstooth & Scaringbone Designer Series Paper. I wanted my edge of the rosette to have points just like the one in the Designer Rosette Bigz XL die but because the folds there are at every 1/2" I cut each point using my papersnips. The little spiderweb is from Spooky Bingo Bit and the Boo! from Tiny Tags stamp sets. Black 3/8" Taffeta Ribbon makes a super fun layer between the rosette and scalloped circle.
My last ornament is actually using a technique that was showcase in last year's Holiday catalog. The cones are made by punching our squares of paper then rolled and glued in to cones...messy I had to wash hand several times...but the end result is so worth it. The Spooky is from the Border Banter Stamp Set and attached with a 3/8" Basic Black Glimmer brad on top of a snippet of Silver Glimmer Paper punched out with one of the punches in the Little Labels Punch Pack.
As you can tell I love all that glitters...I can't wait to fill my tree up with more creations. I hope to make some each year to add to my collection.
Please let me know what you think by leaving a comment below... I appreciate you stopping by! For a complete list of all products used see below.
Supplies:
Paper:
Houndstooth and Scarringbone and Orchard Harvest Designer Series Paper, First Edition
Specialty Designer Series Paper, Tangerine Tango, Very Vanilla and Basic Black
Cardstock, Silver Glimmer Paper
Stamp set: Tiny Tags, Border Banter, Toxic Treats
Tools: Simply Scored Scoring
Tool, 1 3/4" and 1" Circle punches, 1 1/4" Square Punch, Little Labels Punch Pack, 1 1/4" Scallop Circle Punch
Ink: Staz'on Black Ink and refill
Adhesive: Tombo Multi Glue, Sticky Strip, Jumbo Sticky Rounds, Glue Dots, Dimensionals
Embellishments:
Silver Glass Glitter, Glimmer brads, Crumb Cake 3 1/2" Scalloped Tulle Ribbon, 3/8" Basic Black
Taffeta Ribbon, 1/2" Very Vanilla Seam binding Ribbon, White Baker's Twine, Basic Jewels Rhinestones, Vintage Faceted Designer Buttons, Neutrals Designer Buttons, Basic Glimmer Brads, Large Pearl Basic Jewels


No comments:
Post a Comment